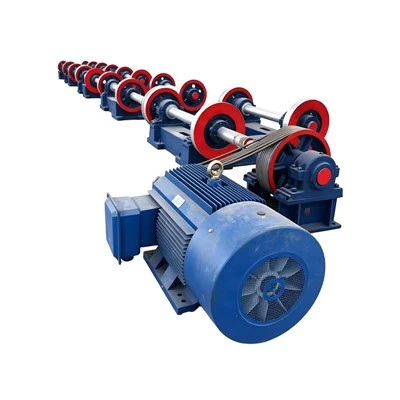
If you’re running a concrete pole making operation (or just getting started, honestly), you know the molds make or break your final product. I’m not here to sell you on a random mold hack I saw on a forum—since I work at a Concrete Pole Making Machine supplier, I’ve spent years testing, tweaking, and training folks on what actually works. Today, I’m walking you through how to build (or spec out, if you don’t wanna fabricate in-house) concrete pole molds that match the quality you want, all while making sense for your production line.
First, let’s get one thing straight: these aren’t the cheap plastic tubs you use for backyard concrete projects. Concrete pole molds need to hold up to heavy centrifugal force, resist rust from wet concrete and additives, and stay precise so every pole comes out straight, no wonky ends or thickness gaps. If you skip the details here, you’ll be reworking poles, dealing with mold leaks, or replacing molds every 6 months—total waste of time and cash.
Start with the Basics: Understand What Your Mold Needs to Do
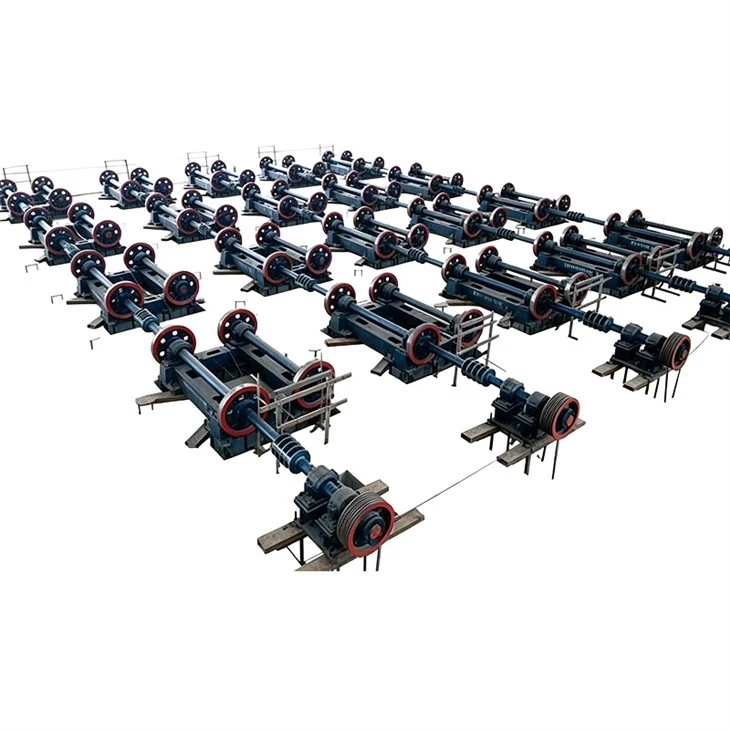
Before you even touch metal or measure anything, think about how you’re making your poles. Most concrete pole production relies on a Concrete Pole Centrifugal Spinning Machine (that’s the machine that spins the mold super fast to evenly distribute concrete, eliminate air bubbles, and make strong, dense poles). Your mold has to fit snugly into that spinning rig—loose molds will wobble, leading to uneven concrete and ugly, weak poles.
Also, what kind of poles are you making? Utility poles (6ft to 40ft), road sign poles, or something custom? The wall thickness, diameter at the top and bottom, and taper of the pole will directly dictate your mold specs. For example, a 30ft utility pole needs a consistent taper, so your mold’s inner curve has to be precise within millimeters—no cutting corners here. If you’re using a Cement Pole Making Machine (which is basically the same as concrete pole machines, just a regional name), the mold requirements don’t change much, but double-check your machine’s mounting points to avoid fit issues.
Step 1: Pick the Right Material (Don’t Cheap Out on Steel)
You might be tempted to use mild steel because it’s cheaper, but here’s the truth: mild steel rusts fast when exposed to wet concrete and curing compounds, and rust translates to rough, pitted pole surfaces that you’ll have to grind or sand later. The gold standard for concrete pole molds is high-grade carbon steel—specifically, 1020 or 1025 steel. It’s strong, resists warping under centrifugal force, and holds up to repeated cleanings way better than mild steel.
Wait, what about thickness? For molds that go on a standard Concrete Pole Making Machine, go with 6mm to 8mm steel. If you’re making extra-long poles (over 35ft), bump it up to 10mm to prevent flexing during spinning. Flexing leads to uneven pole walls and even mold damage—we’ve seen clients waste thousands on thin steel molds that bend after just 50 uses.
Step 2: Design the Mold (Match It to Your Machine’s Exact Specs)
This is where a lot of new operators mess up. The mold can’t just be a curved steel tube—it has to have specific parts to work with your equipment. Let’s break down the key components:
- Shell: The main curved part that forms the pole. It has to have the exact inner diameter (top, bottom, and taper) you need for your poles. Most molds are split into two halves (left and right) that clamp together tightly—this makes it easy to remove the cured pole without chipping or breaking it.
- End Plugs: The round metal caps that seal the ends of the mold. They have to have a central hole for the concrete feed (or for venting air when spinning) and a mounting bracket that locks into your centrifugal spinning machine. This is non-negotiable—if the end plugs don’t line up with your machine’s mounts, the mold won’t spin, period.
- Clamping System: You need heavy-duty bolts or quick-release clamps to keep the two mold halves sealed during spinning. Think 10+ bolts per half for a 30ft mold—leaks here mean concrete seeps out, leaving lumpy edges on your poles that look unprofessional and fail quality checks.
If you’re not a metal fabricator, don’t stress. We have a dedicated Concrete Pole Steel Mold page (linked right here) that has pre-designed molds for all standard pole sizes, sized to fit our Concrete Pole Centrifugal Spinning Machine perfectly. No guesswork, no measuring mistakes—just order and hook it up.

Step 3: Weld It Properly (Bad Welds = Mold Failure)
Welding is make-or-break here. If you cut corners on welding, your mold will crack, leak, or fall apart mid-spin. Here’s what to follow:
- Use a MIG welder with a solid steel core wire (like ER70S-6) — it’s strong and gives clean, consistent welds that don’t leave gaps.
- Always weld the inside and outside of all seams (the shell’s split line, end plugs to the shell, mounting brackets). Skip one side, and you’ll get concrete seepage or a split mold during operation.
- Grind all welds smooth on the inside of the mold. Rough weld bumps will leave imperfections on the inside of your concrete poles, which can create weak points over time. If you’re using a pre-fabricated mold from us, we already grind all welds for you—another win for ordering instead of DIY.
Pro tip: If you’re making molds in-house, test them with water before adding concrete. Clamp the halves tight, fill the mold with water, and spin it gently (or just leave it upright for 24 hours) to check for leaks. If you see even a tiny drip, re-weld that spot—fixing it now is way cheaper than fixing a ruined pole later.
Step 4: Prep the Mold for Concrete (This Makes Demolding Easy)
No one wants to spend 30 minutes chiseling a cured pole out of a mold. The secret is a good release agent. After welding and grinding, you need to coat the entire inside of the mold with a non-stick release agent—make sure it’s made for concrete, not just generic cooking spray (that will burn off under spinning heat and make a mess). We recommend a water-based release agent because it’s easy to apply and doesn’t leave a greasy residue on your poles.
Another small step that makes a huge difference: after every use, clean the mold immediately. Use a pressure washer to blast out leftover concrete slurry, and wipe the inside with a rag to remove any dust or debris. If you skip this, dried concrete will build up over time, making the mold smaller than it should be—resulting in poles that don’t fit when you need them, or even mold halves that won’t close.
Step 5: Fit the Mold to Your Production Line
Once your mold is done, make sure it works with all your equipment. If you’re using a Concrete Pole Centrifugal Spinning Machine, double-check that the end plug mounts line up with the machine’s spinning shafts. If you’re using a Concrete Pole Welding Machine (for adding rebar cages inside the concrete pole), make sure the mold’s inner diameter is wide enough to slide the rebar cage in easily—no forcing it, that can bend the rebar or scratch the mold.
If you’re not sure how to test this, reach out to us. We have a team of engineers who can help you spec a mold that works with whatever line you have, whether you’re a small local shop or a large industrial facility. We’ve worked with hundreds of operators to match molds to all types of Cement Pole Making Machines, centrifugal spinning rigs, and welding equipment.
Common Mistakes to Avoid (I See These All the Time)
- Using too-thin steel: As I mentioned earlier, 6mm is the minimum for standard poles. Thin steel flexes, leading to uneven wall thickness and ruined poles.
- Skipping the weld test: Don’t assume your welds are good. Test with water, or run a small batch of concrete through a spare mold to check for leaks.
- Using the wrong release agent: Generic spray can leave residue that messes with concrete curing, leading to poles that are weak or have a dull finish.
- Forgetting maintenance: Molds need regular upkeep—clean them after every use, inspect welds for cracks every month, and touch up paint on the outside to prevent rust. We sell replacement parts for our Concrete Pole Steel Molds too, so you don’t have to buy a whole new mold if a clamp breaks or a mount gets damaged.
If you’re still on the fence about DIY vs. ordering a pre-made mold, let’s be real: for most people, ordering a custom or standard mold from a reliable supplier is worth it. DIY takes time, requires skilled labor, and one small mistake can set you back weeks. We’ve been supplying Concrete Pole Making Machine and molds for over a decade, so we know what works—and what doesn’t. Our Concrete Pole Steel Molds are made to last for 5+ years with proper maintenance, and they’re precision-cut to fit our centrifugal spinning machines perfectly.
Ready to Get Started?
If you’re in the market for molds, or even a whole Concrete Pole Making Machine to go with them, we’ve got you covered. Our team can answer questions about size, material, compatibility, and anything else you need to get your production line up and running right. No pushy sales calls, just honest advice from people who actually work in this industry. Reach out to our team to learn more about our Concrete Pole Steel Molds, centrifugal spinning machines, Concrete Pole Welding Machines, and all the gear you need to make high-quality concrete poles.
References
- Concrete Pole Manufacturing: Industry Standards for Mold Design and Production, American Concrete Pipe Association, 2022
- Centrifugal Spinning for Precast Concrete Poles: Material and Equipment Best Practices, Precast Concrete Institute, 2021
- Steel Mold Maintenance Guide for Concrete Pole Production, Global Precast Machinery Association, 2023